Manually Set Up E-mail with Mozilla Thunderbird for Mac
Manually Set Up E-mail with Mozilla Thunderbird for Mac
For customers using Macintosh computers.Follow the steps below to connect your 1&1 e-mail account with Mozilla Thunderbird for Macintosh using IMAP protocol.
Step 1Launch Mozilla Thunderbird. If it is your first time launching Mozilla Thunderbird, the Mail Account Setup Wizard should appear and you may skip to step 4. Otherwise continue with the next step.
Step 2
From the Mozilla Thunderbird window, select Tools > Account Settings
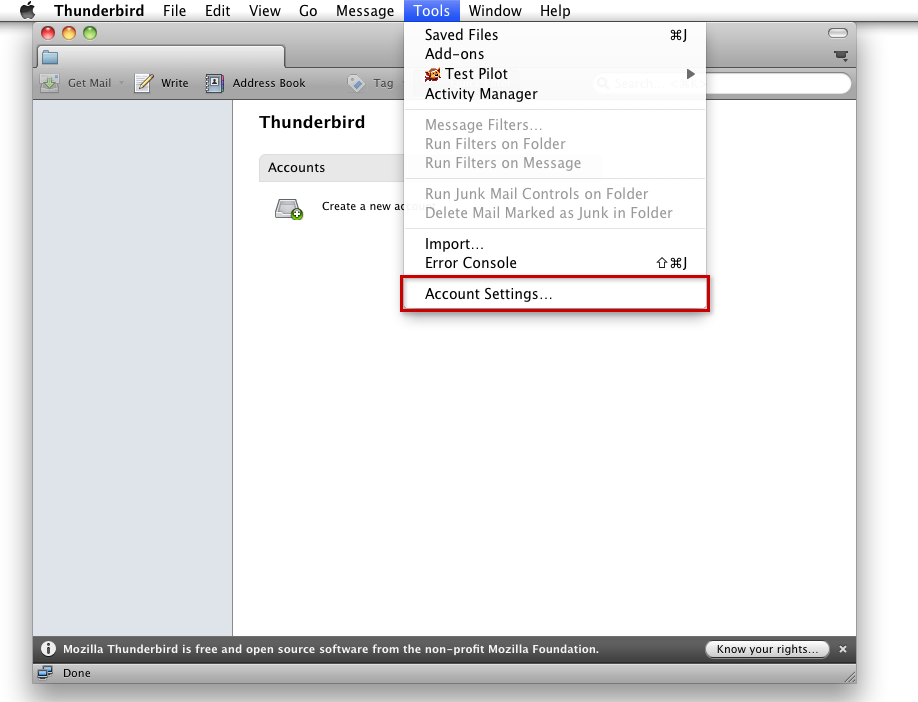
Select Tools > Account Settings
Step 3
At the bottom-left, select Account Actions and then Add Mail Account
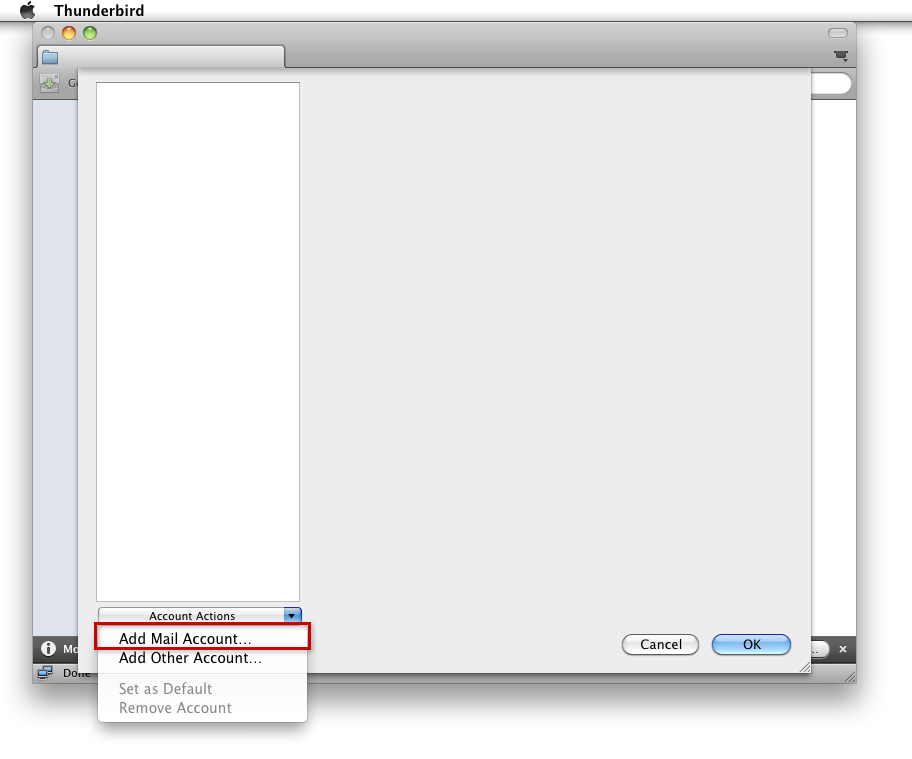
Select Account Actions then Add Mail Account
Step 4
Enter Your name, your full 1&1 Email address and your e-mail address Password.
Check the box for Remember password if you do not wish to enter your password every time when checking or sending e-mail.
Then, click the Continue button.
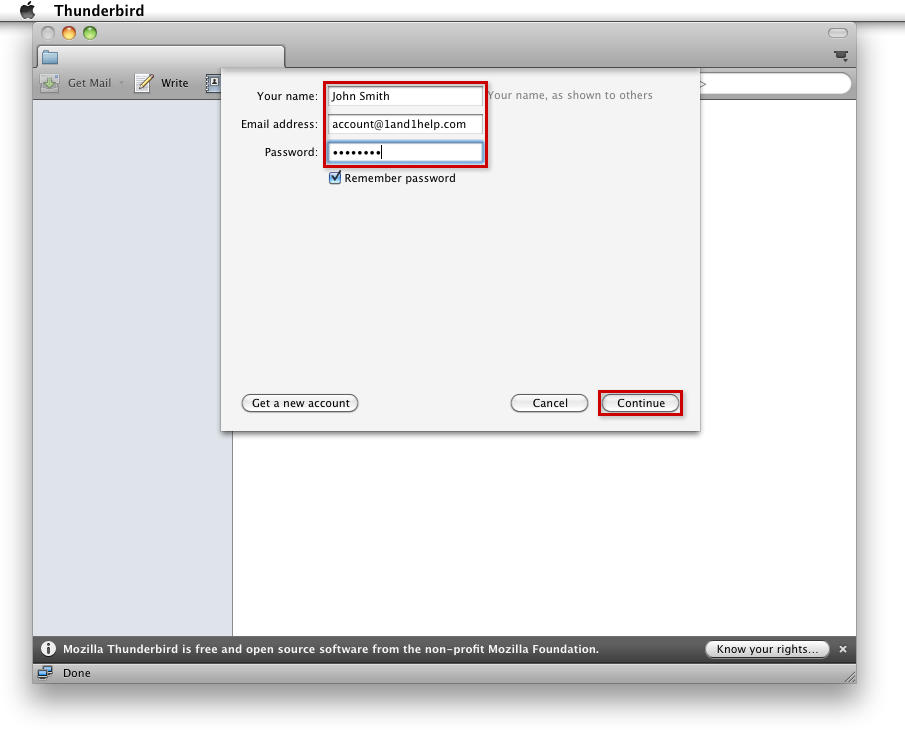
Enter the appropriate information and click Continue
Step 5
Suggested settings may be provided for you. Be sure to select IMAP to view the suggested IMAP settings. In this example, the suggested settings are incorrect so we will click the Manual config button to enter the correct information.
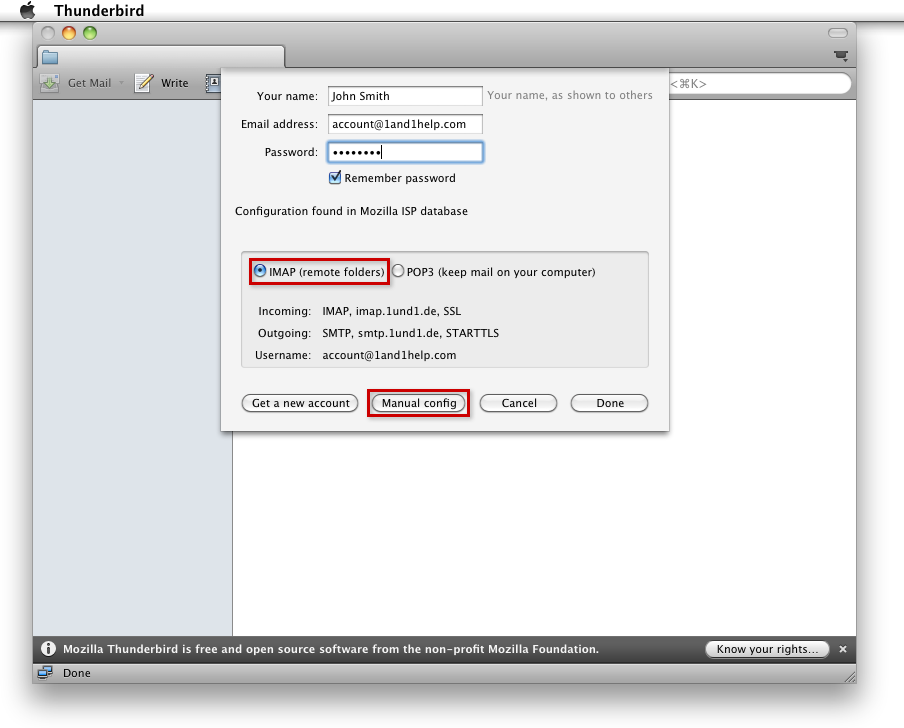
Click Manual config
Step 6
Enter the following information in the appropriate field:
Incoming : IMAP
Incoming Server hostname : mail.lvo-associates.com
Incoming Port Number : 143
SSL drop-down menu : STARTTLS
Authentication drop-down menu: Normal password Outgoing : SMTP
Outgoing Server hostname: mail.lvo-associates.com
Outgoing Port Number : 587
SSL drop-down menu : STARTTLS
Authentication drop-down menu : Normal password
User Name : larry@lvo-associates.com
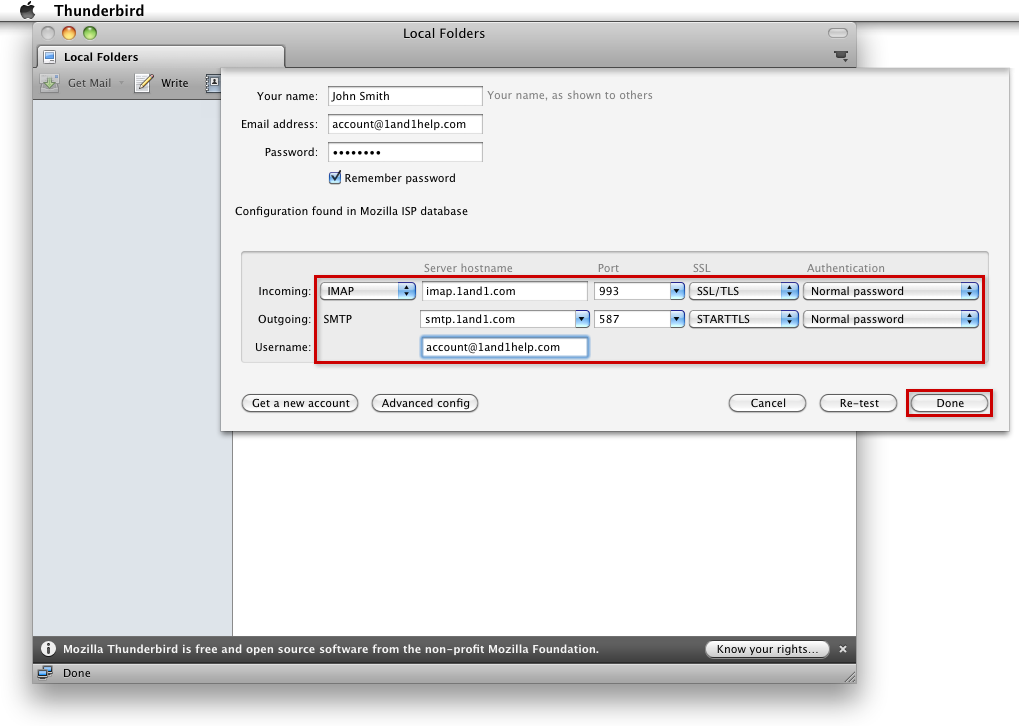
Enter the appropriate information and click Done
Step 7
Click the OK button to save your settings.
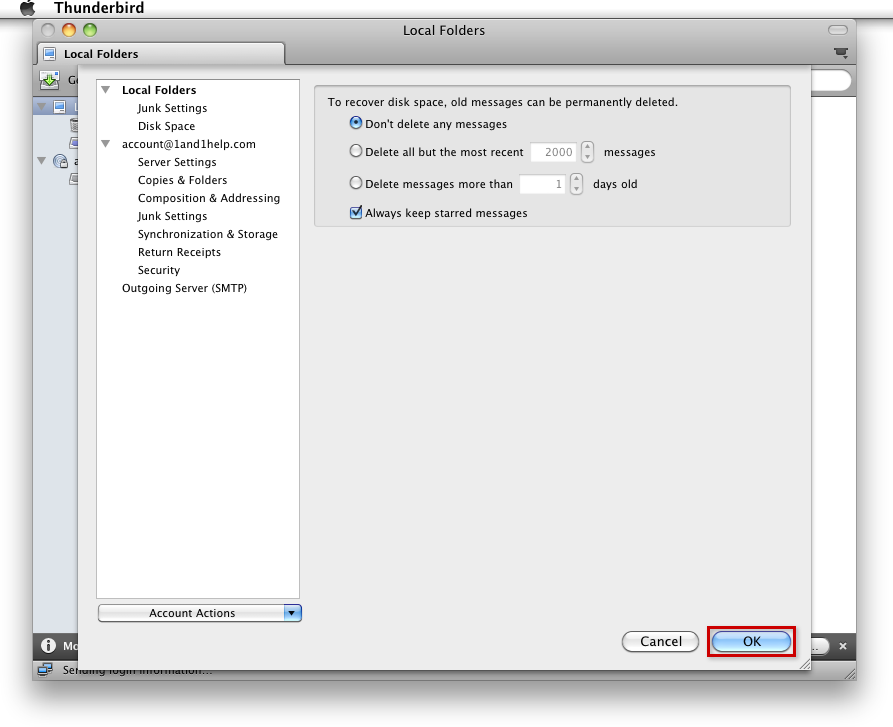
Click OK